Ever since I’ve had a home Windows server I’ve run a firewall. At the beginning it was Microsoft ISA 2006. I liked this as it integrated nicely into Active directory, but the problem was Microsoft never replaced it & its EOL was in 2015. I switched to IPCop which worked fine, but when that software was also abandoned I searched for a replacement. I narrowed the choice down to either pfSense or OPNsense. I chose OPNsense simply because its graphs were prettier. I took advantage of its Dynamic DNS service to update my external IP using www.dynu.com without additional software, which was nice.
Another service is the Wireguard VPN which I installed to allow me to access my internal network remotely so I can boot computers, access files & control remote desktop PCs. Here’s how I did it.Install the Wireguard plugin from OPNsense by navigating to System⇒Firmware⇒Plugins. You’ll now find the Wireguard control panel in VPN⇒Wireguard.
In the Wireguard panel, select the Local tab and press the + to create a new VPN tunnel. 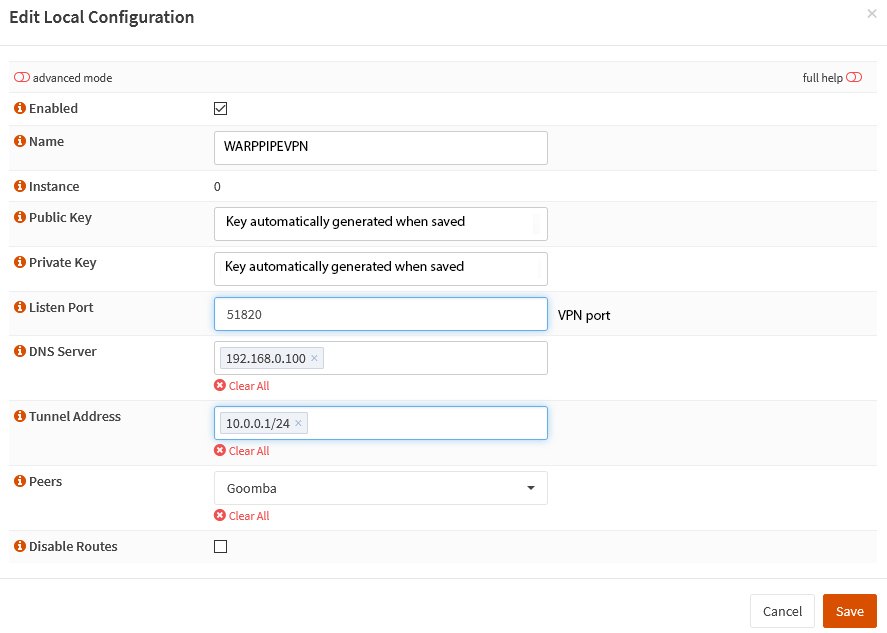
The ‘Name’ field can be anything you like, both the Public & Private keys are automatically generated once you save the form. The listen port by default is 51820, but this can be anything that’s no already in use on your system. The DNS server is the IP address of the DNS server(s) on your local network. The tunnel address is an address range not used on your local network that will be used for traffic on the VPN. Peers will not be populated yet, as that is a list of clients allowed to connect, these are created in the Endpoints tab.
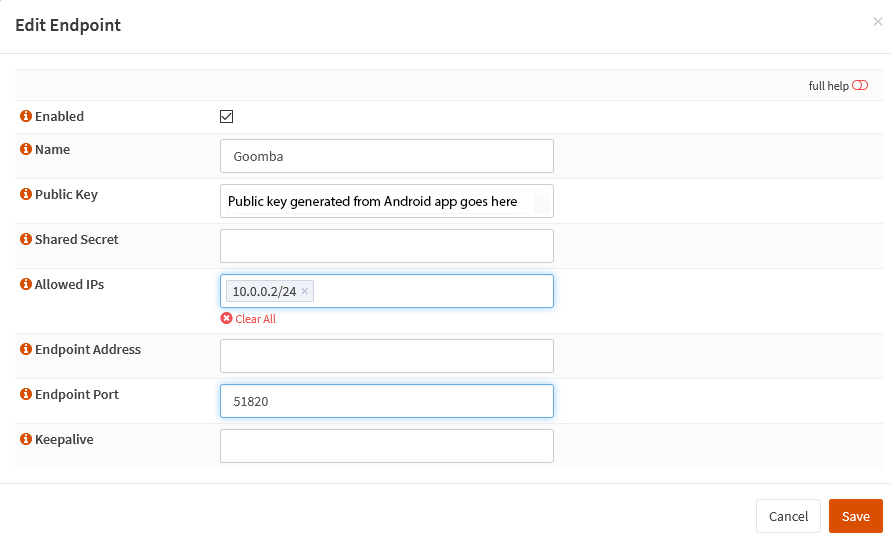 Next we’ll fill in the devices to be connected to the VPN in the Endpoints tab.
The name can be anything you like, ideally a description of the connecting device. The public key that goes here will be generated in the Wireguard Android app later on. The allowed IPs are the IP addresses that the device will use to connect to on the VPN network.
Next we’ve got to ensure the VPN interface is enabled. In interfaces select the new port (probably labelled wg0) tick the enable interface & prevent interface removal check boxes & fill in the description field, this will be the VPN interface name.
Go to Firewall⇒Rules⇒Wireguard VPN interface name & add a rule.
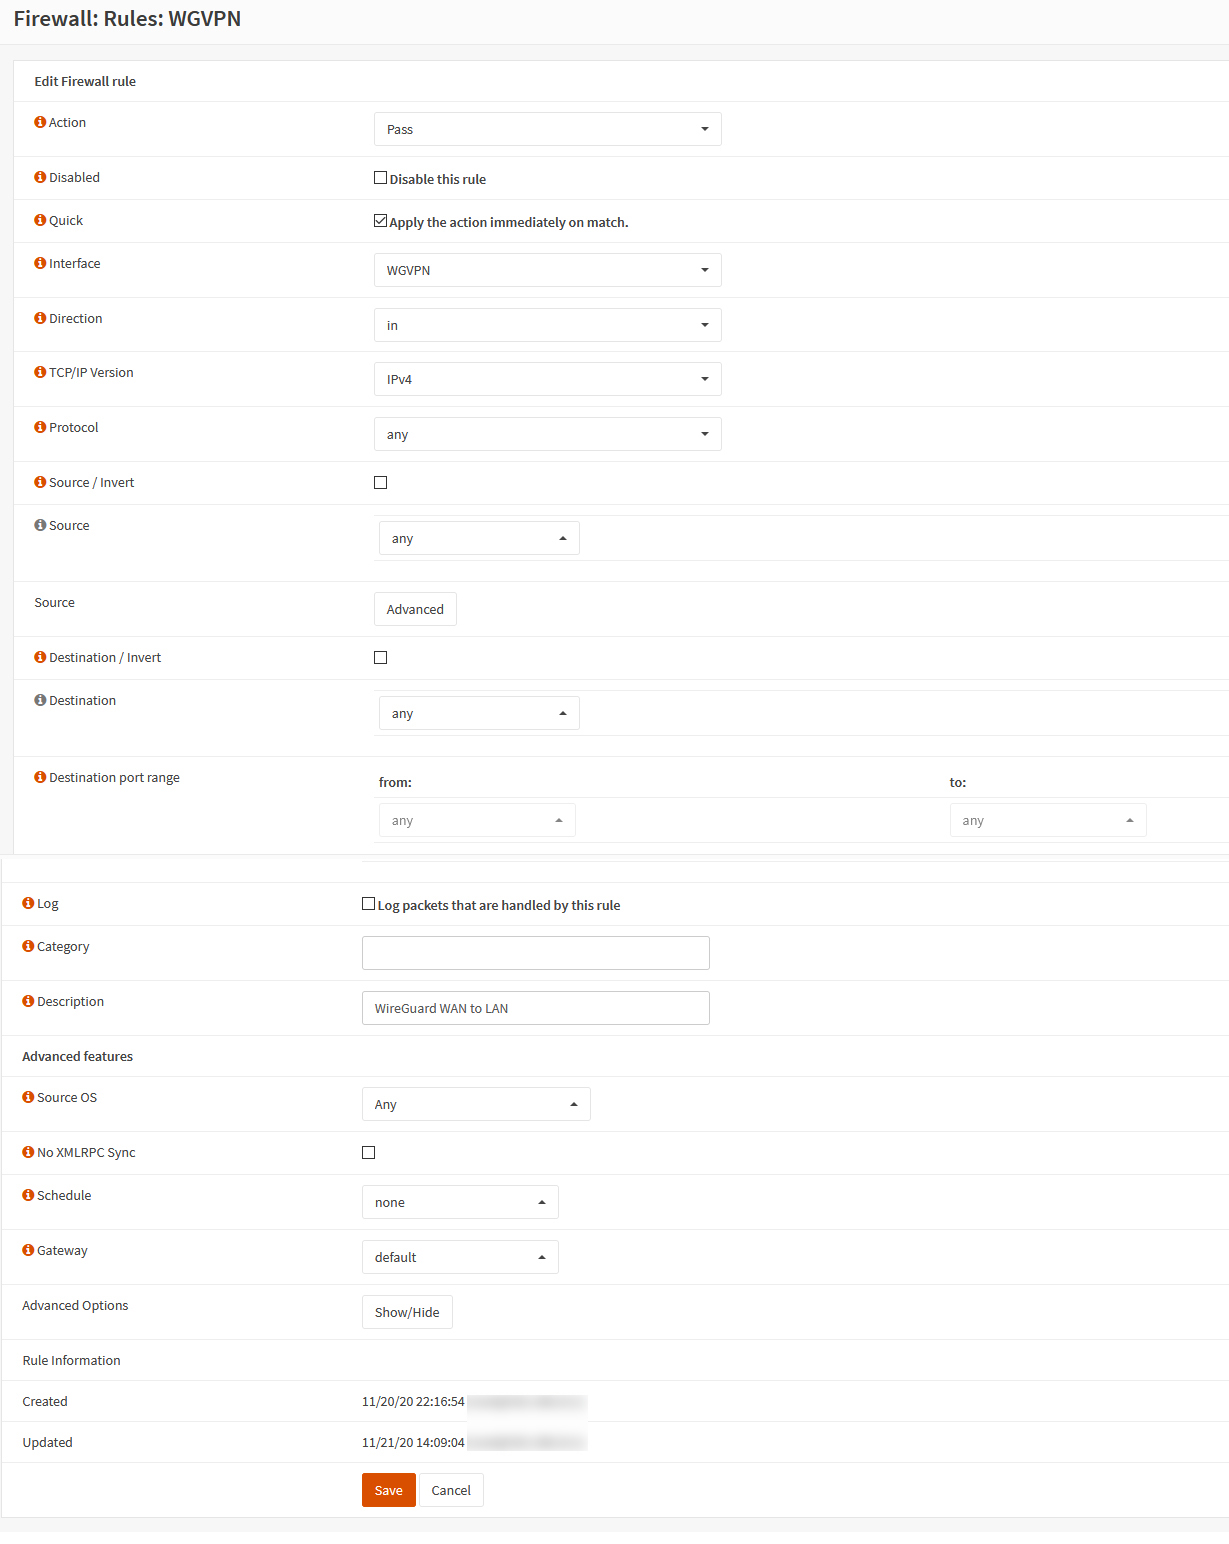
Set the form up like above, this rule allows traffic over the VPN access to the entire network.
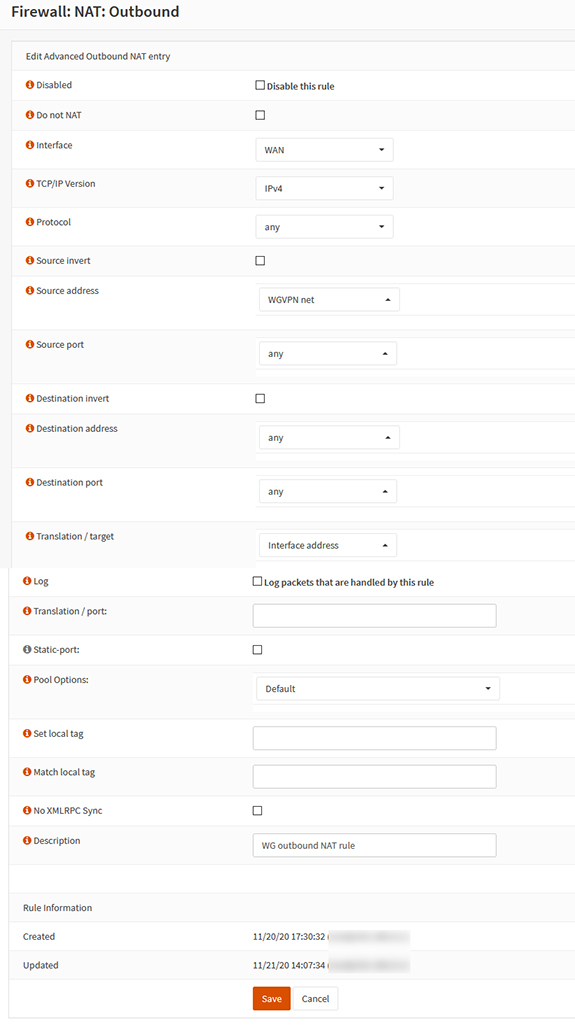
Next go to Firewall⇒NAT⇒Outbound to configure allowing devices on the VPN to connect to the internet over your home connection. Select Hybrid outbound NAT rule generation, then add a new rule.
 Next, we’ll need to port forward the traffic.
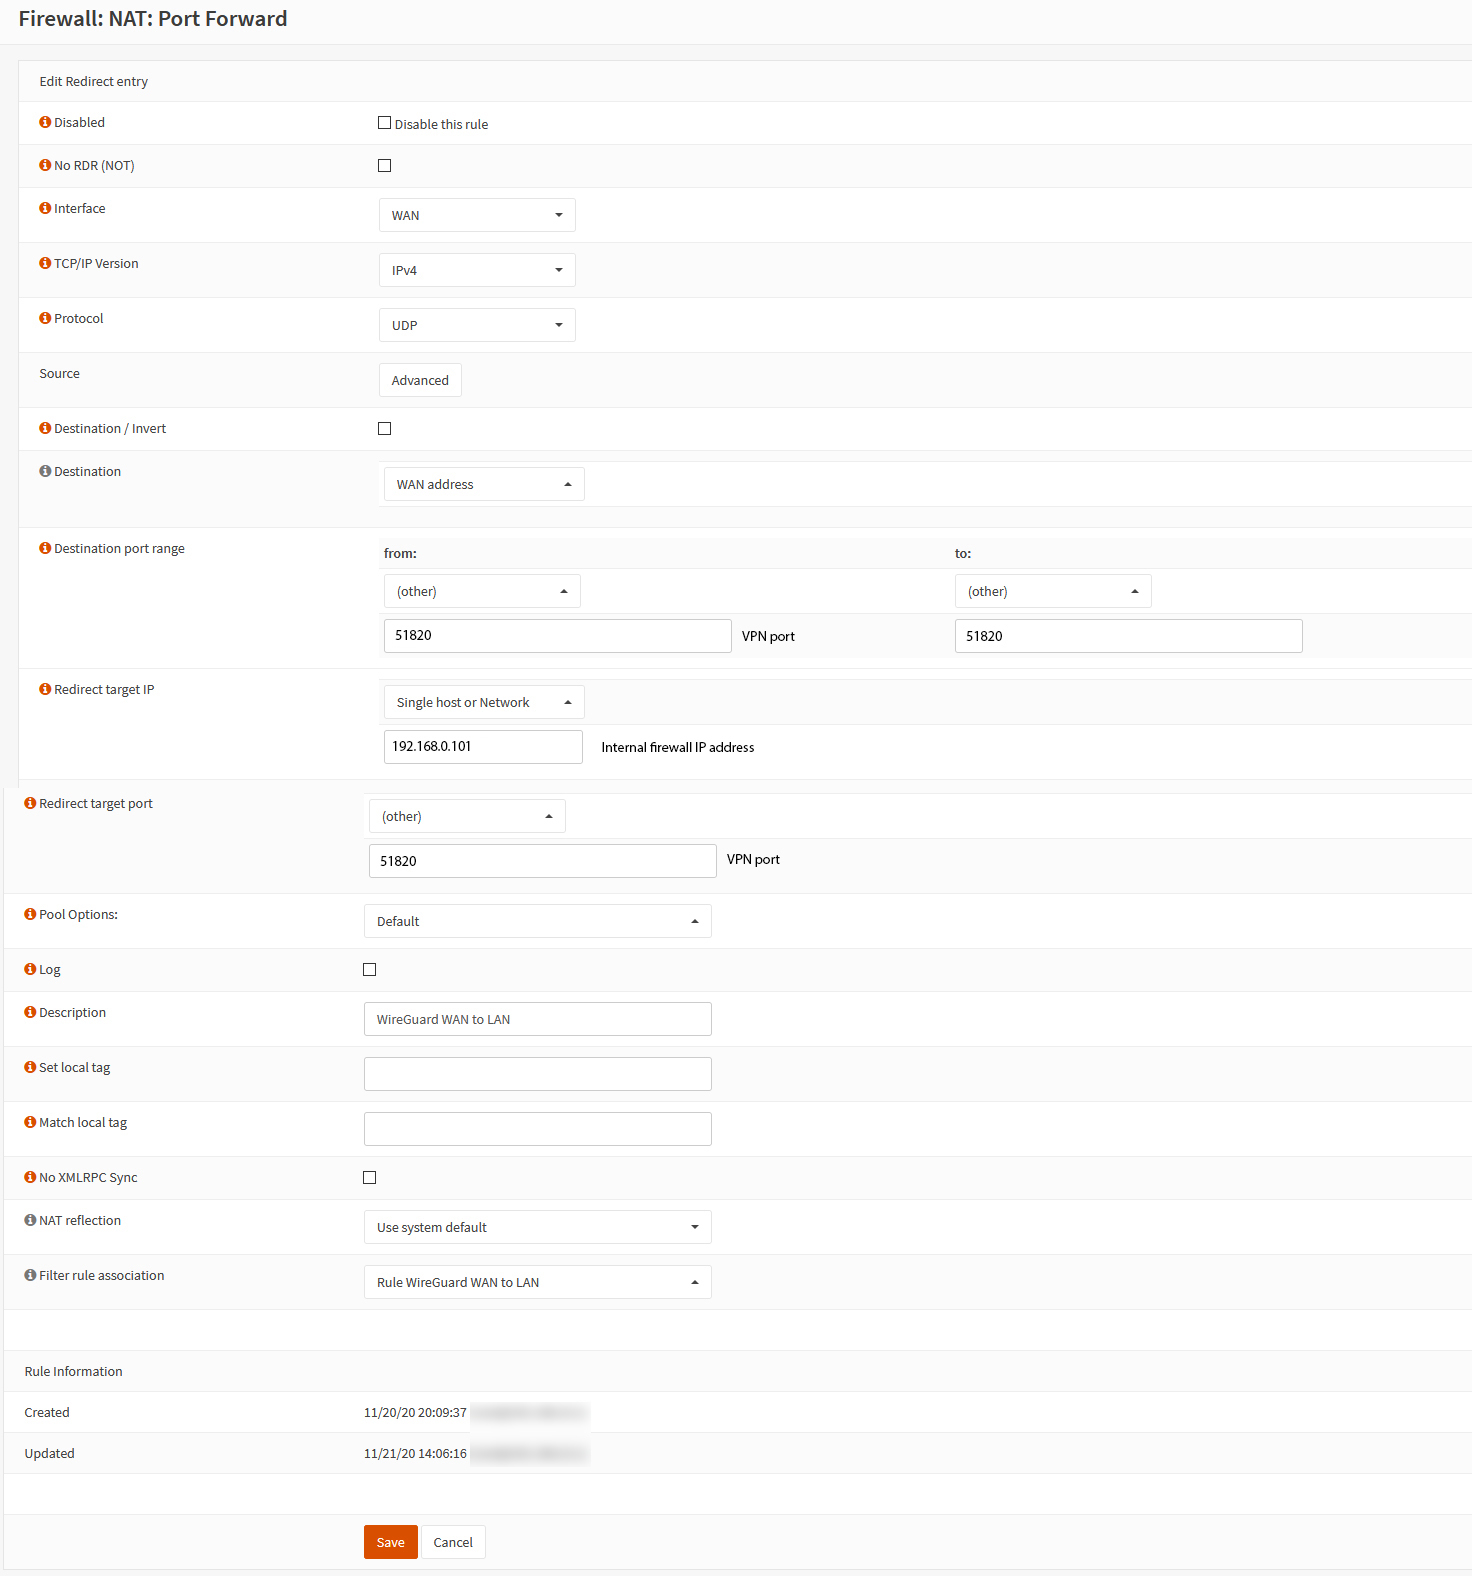 Here the Target IP is the internal IP address of your OPNsense firewall & the port is whatever you chose on the first step.
That’s the OPNsense part done. Now we configure Android. First download the Wireguard app from the app store, run it & press the + to add a new connection.
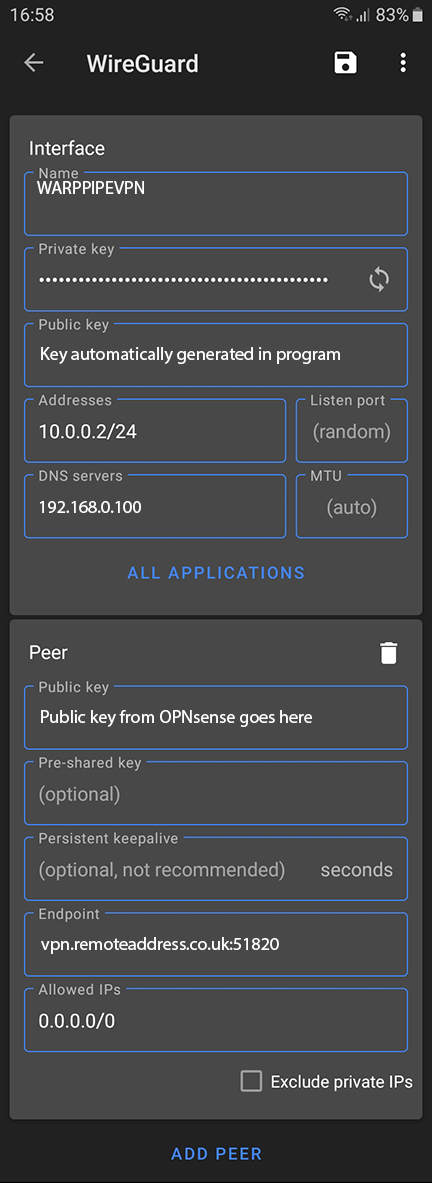 The Name can be anything you like. Press the generate button to the left of the Private key field to create both public & private keys for the app.
The Address is the IP address your device will use on the VPN & the DNS server is the local IP address for the DNS server on your LAN.
The OPNsense WireGuard public key generated in OPNsense⇒VPN⇒Wireguard⇒Local is inserted here in the Public key field. The endpoint is the remote address of your OPNsense firewall with the port used after a colon. Allowed IPs set to 0.0.0.0/0 route all traffic over the VPN.